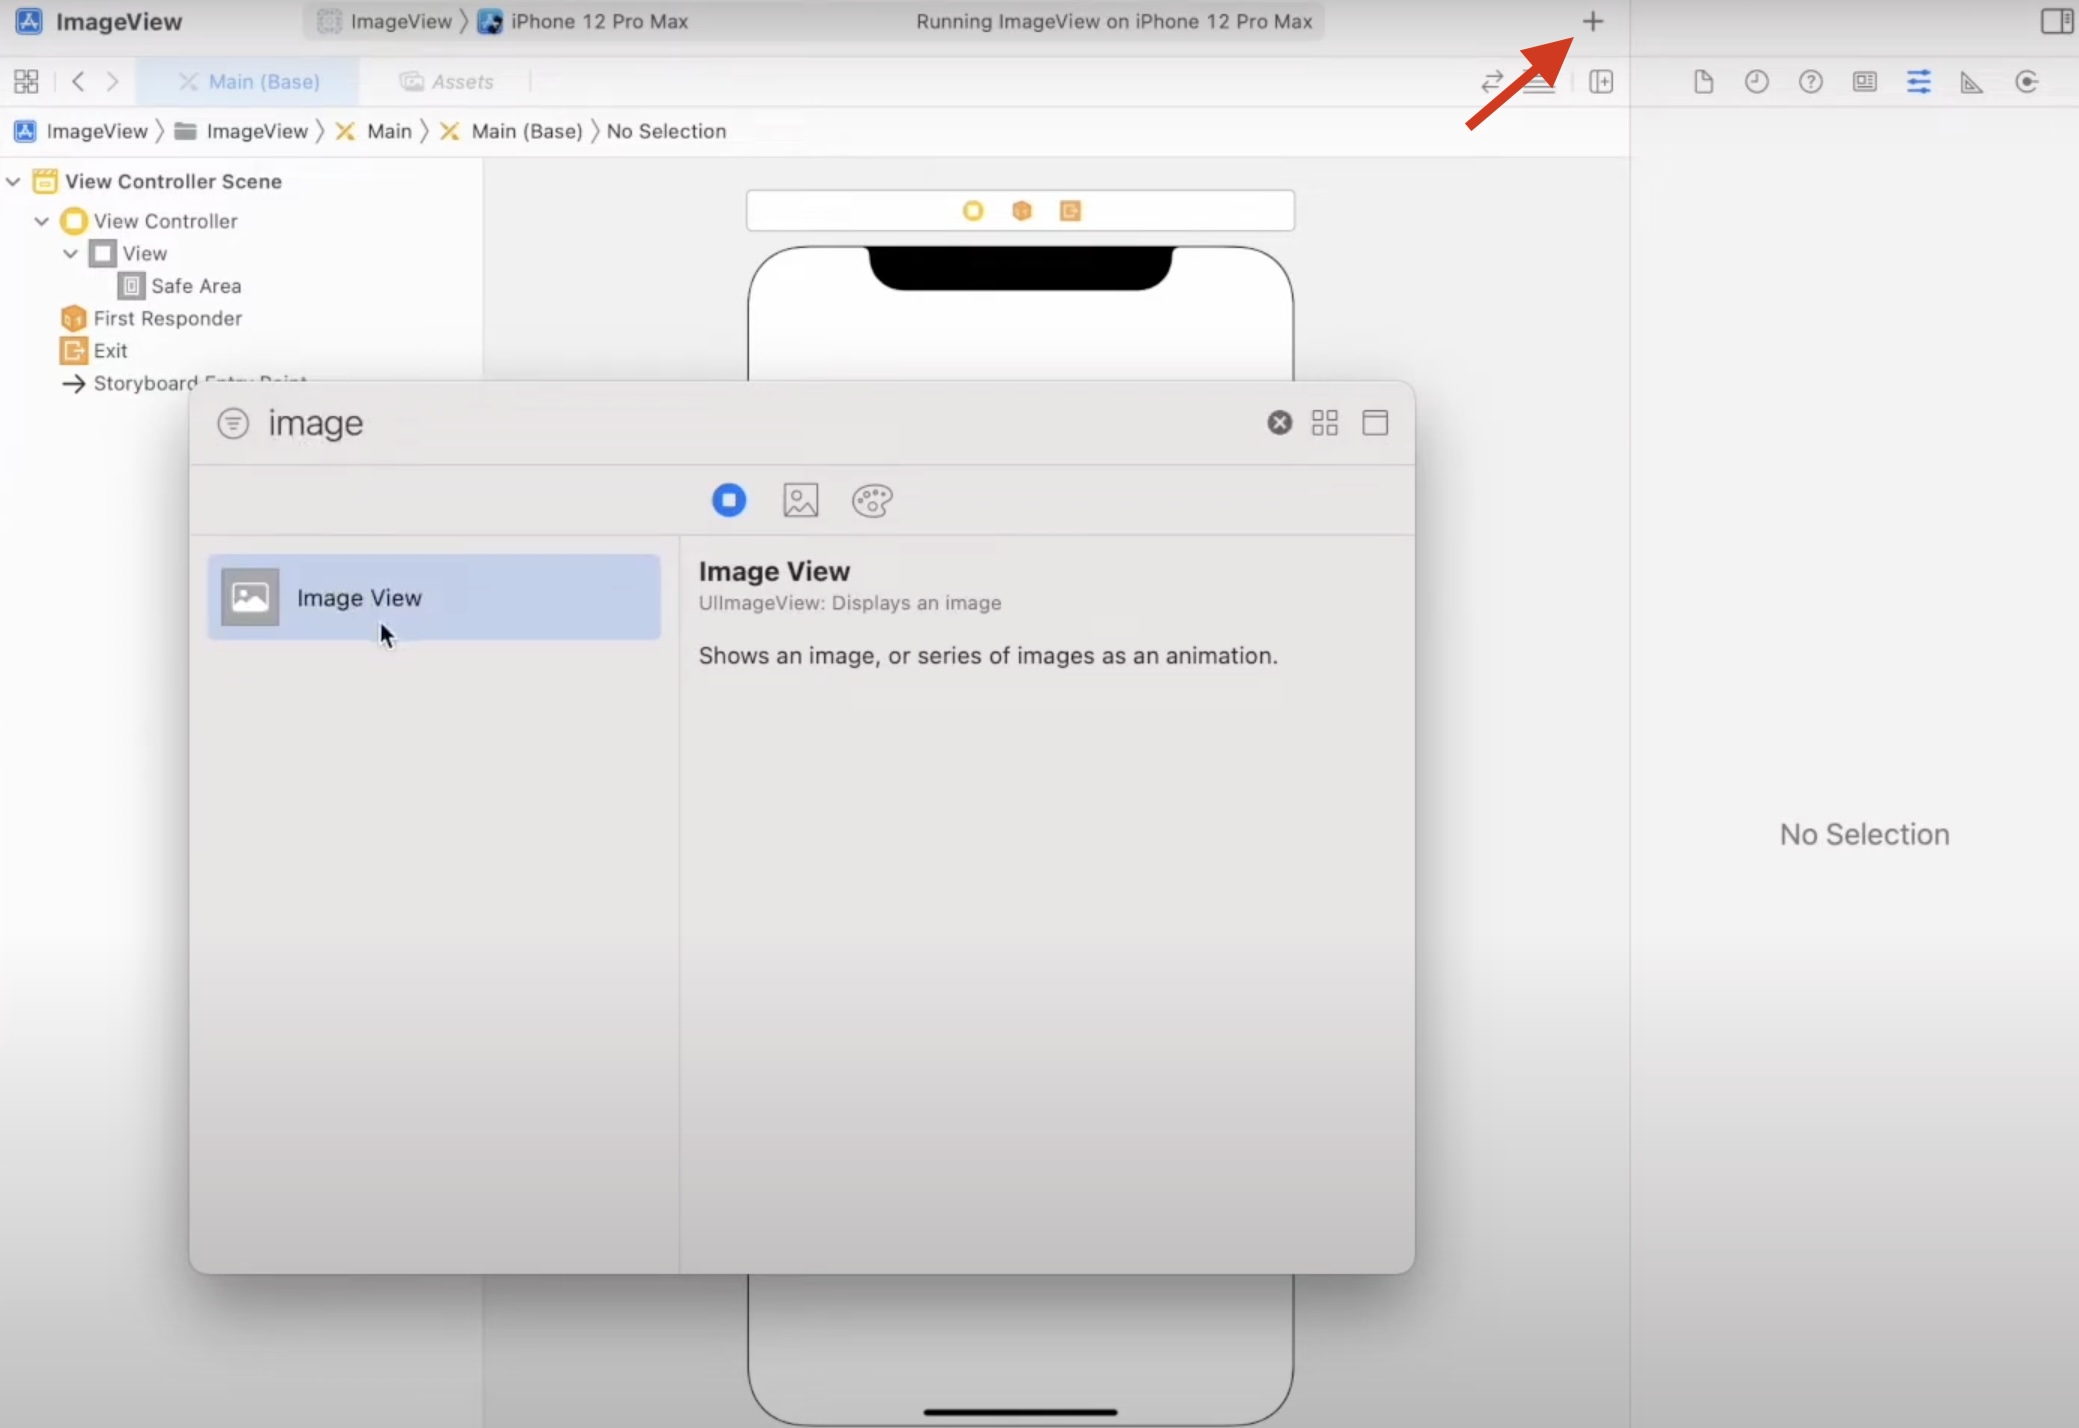
To add an image to a view controller, you can first open the object library by clicking on the plus icon at the top. From there, you can search for UIImageView and then drag and drop it onto the view controller.
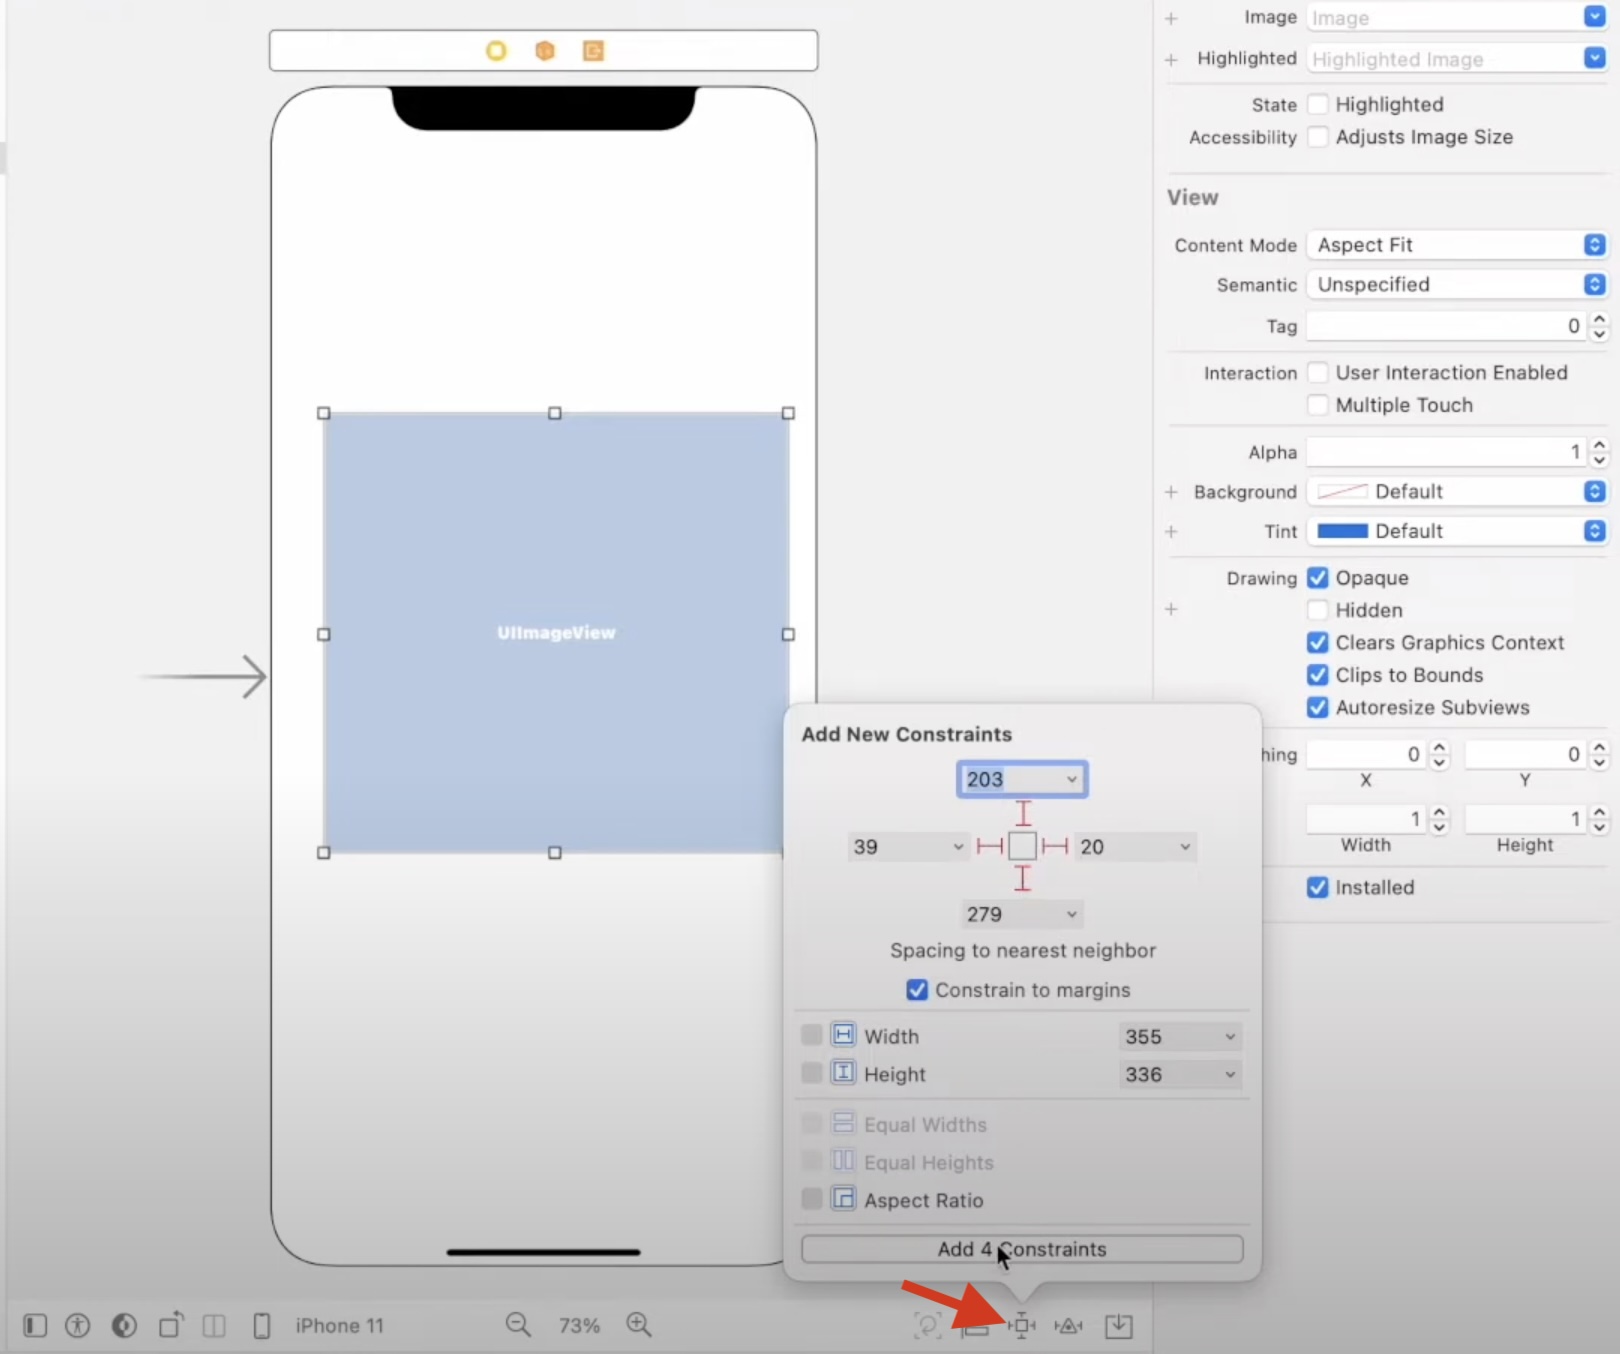
To set the constraints of the UIImageView, you can click on the bottom pointed icon and adjust the top, left, right, and bottom constraint values as per your requirements. Once you have set the constraints, click on the “Add 4 Constraints” button to apply them.
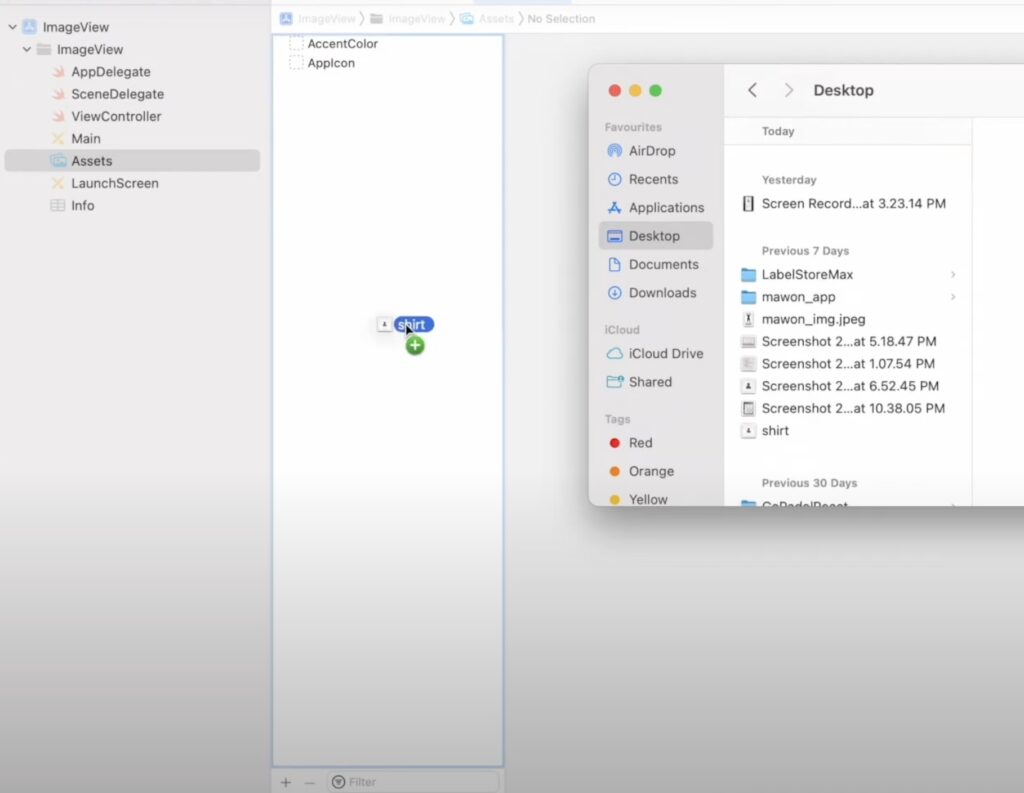
To add an image to your Xcode project, you can drag and drop the desired image into the “Assets” folder in the project navigator. This folder is usually located at the root of your project. Once you have added the image to the folder, you can easily reference it in your code and display it in your UIImageView.
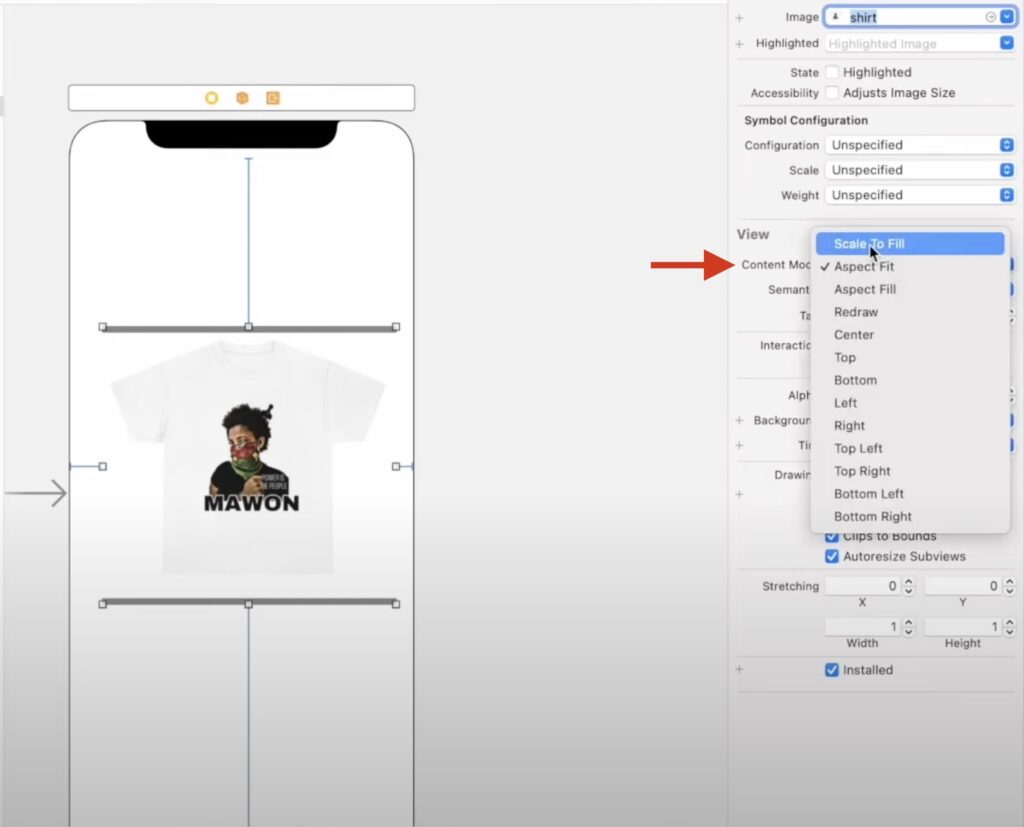
Change background color of the UIImageView to grey. This will help to check the content mode property.
Once you have set the background color, you can search for the desired image and add it to the UIImageView. To do this, you can select the UIImageView and open the Attributes inspector. From there, you can select the Image option and choose the desired image.
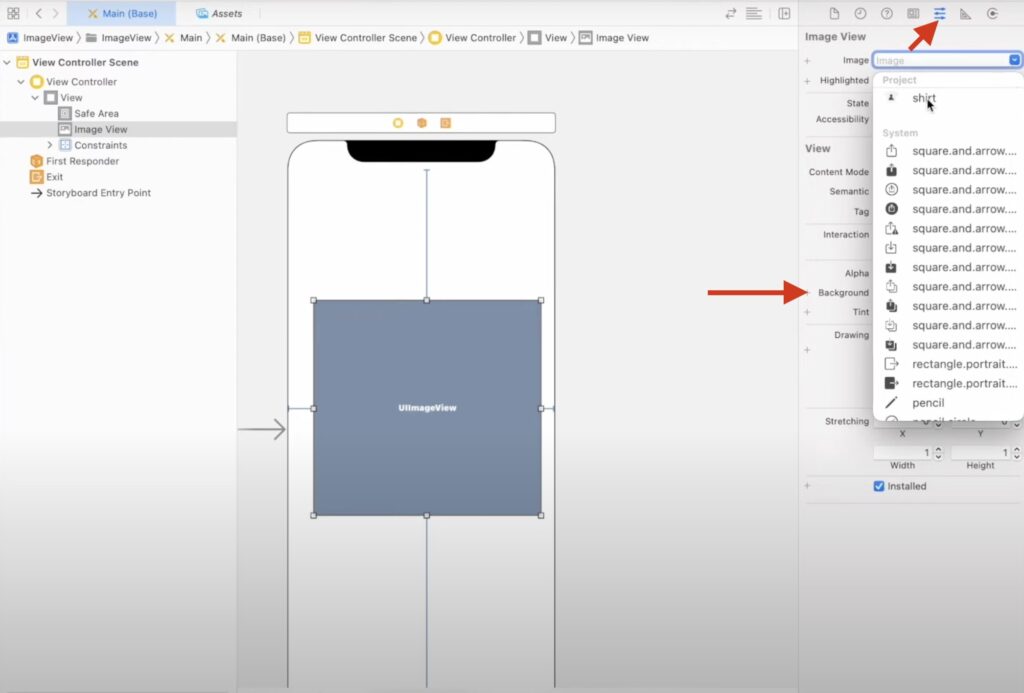
After adding the image, you may notice gray color on the top and bottom of the image. To fill the ImageView, you can set its content mode property to ‘Scale to Fill’, but this will not maintain the image’s aspect ratio. To preserve the image ratio correctly, you can choose ‘Aspect Fill.’
